

Summary
Cleaning a film camera doesn't require sophisticated equipment, but it does require precise steps and the right tools. The following guide will walk you through cleaning everything from the body to the lenses, and help you recognize when professional servicing becomes necessary. Here you'll find practical advice, the right tools, the correct cleaning products, and actions to avoid to clean your camera without taking risks.
How to clean a film camera
A film camera quickly attracts dust. It settles on the lens, in the viewfinder, around the bayonet mount, on the exterior of the body, and sometimes inside the film chamber. The good news is that regular maintenance is often enough to prevent the most common problems.
If you're looking for the right accessories, a selection of film camera accessories is available to complete your kit.

Preparing your environment and cleaning equipment
Before you start, set yourself up in a quiet, clean place with little air circulation. A slightly humid room can help dust particles settle. The idea is simple: the less the air moves, the less dust settles on surfaces during cleaning.
Keep a small, consistent kit handy, without accumulating unnecessary accessories:
- A microfiber cloth for optical cleaning and delicate surfaces.
- A clean, soft brush to remove dust without rubbing.
- A blower bulb or bellows to dislodge particles without direct contact.
- Cotton swabs for corners, buttons, and certain internal areas.
- An optical cleaner or isopropyl alcohol, used sparingly, never sprayed directly onto the camera.
Avoid paper tissues, dishcloths, household cleaning products, and any compressed air that is too powerful or poorly controlled. On a lens, a wrong move can quickly cause micro-scratches. On an old camera, improperly applied liquid can also move grease or penetrate where it shouldn't.
Cleaning the camera body and lens elements
Cleaning the camera body
Start dry. Use a soft brush on the exterior, then wipe with a clean microfiber cloth. Pay special attention to crevices, controls, and the bayonet mount. For ingrained dirt, use cotton swabs lightly moistened with isopropyl alcohol.
Cleaning the lens
First, remove dust with a blower bulb or brush, then clean wet if necessary. Apply optical cleaner to the microfiber cloth, never directly to the lens. Work in circular motions, without pressing. For grease marks, take your time: they are often more bothersome than a few isolated particles.
To remember
- Cleaning the lens too often or too vigorously can do more harm than good.
- A lens does not need to be rubbed every time it is used.
- Regular, light, and clean maintenance makes a real difference over time.
Cleaning the interior of a film SLR
Inside, be careful. The mirror and viewfinder are fragile. Use only air, a blower bulb or bellows. Compressed air requires great caution and should not be brought too close. Do not touch the mirror or optical elements.
For the viewfinder, work with precision. A cotton swab very lightly dampened with isopropyl alcohol may be suitable for certain accessible parts. If you feel resistance, stop. On a film camera, seeking perfection is often the best way to damage a part.
You can open the back to check the film chamber. Gently clean the edges, pressure plate, and accessible areas with cotton swabs. Do not press on the shutter curtain. If the foam disintegrates or sticky residue appears, a more comprehensive intervention should be considered.
When to call for professional servicing
Many cameras are several decades old. Grease dries, migrates, or solidifies. Shutter speeds become erratic, the trigger loses consistency, and some parts malfunction. This is where home maintenance reaches its limits.
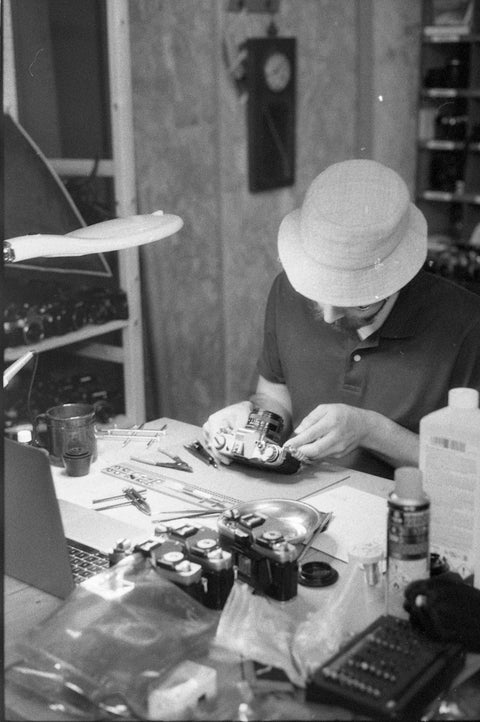
Serious servicing goes beyond cleaning. It can include disassembly, relubrication, foam replacement, shutter speed testing, and light meter verification. This type of intervention requires specialized tools, experience, and appropriate parts. It is not a good area for experimentation.
A diagnosis helps determine whether the issue is dirt, a mechanical problem, or a need for a complete overhaul. When in doubt, have the camera checked rather than forcing a delicate manipulation.
| Area to clean | Recommended tool | To avoid |
| External body | Soft brush, microfiber cloth, cotton swabs + alcohol | Dishcloths, household solvents |
| Lens elements | Brush, blower, optical cleaner, microfiber | Paper tissues, direct spray |
| Mirror and prism (SLR) | Blower bulb, compressed air | Any physical contact |
| Viewfinder | Mini LensPen, cotton swab + isopropyl alcohol | Abrasive dry cloth |
| Film chamber / interior | Clean, dry cotton swabs | Contact with shutter curtain |
If you're looking for a simple rule: start with the exterior, use a soft tool, limit alcohol, and leave delicate manipulations to a professional. This is the safest method to preserve your camera.
Frequently Asked Questions
Can I clean the inside of my film SLR myself?
Yes, but with caution. You can use an air blower bulb to remove dust, without touching the mirror or other fragile elements, then carefully clean the film chamber with cotton swabs. However, as soon as it involves the shutter or an internal mechanism, it's best to stop there. The safest option is then to entrust the camera to a professional.
How often should a film camera be serviced?
Plan for a service every two years if you use your camera regularly. Don't wait if you notice a blockage, irregular film advance, or visible defects in your images. On models from the 1970s to 1990s, old oils and greases can dry out over time, even if the body still seems to be working correctly. A diagnosis for around €30 can help you decide whether to proceed further.