

Summary
Film photography might seem complex at first, but the basics are accessible if you start with the right equipment and a few solid pointers. Here you'll find useful concepts: choosing a camera, understanding the gear, managing exposure, mastering focus, and confidently advancing in your initial film photography practices.
Why Start Film Photography Today
Film photography is based on a simple principle: light exposes a film, then development reveals the image. It's a very concrete logic. For a beginner, it's often a good way to understand what you're doing, because every setting has a visible consequence on the result.

The Educational Benefits of Film for Learning
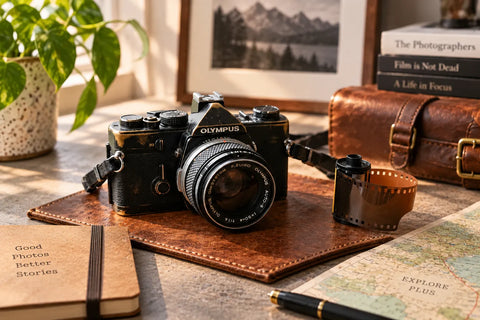
A vintage camera for beginners, especially a model from the 1970s to 1990s, is often a good starting point. These cameras are generally robust, affordable on the used market, and simple enough to learn without getting lost in menus. Some offer an automatic or semi-automatic mode, allowing you to progress at your own pace while still controlling essential settings.
- A useful constraint: with 24 or 36 exposures, you think more before shooting. This limit helps build good framing and observation reflexes.
- No screen for immediate correction: you learn to read the light before shooting, instead of relying on instant verification.
- A very real cost per image: film and development encourage more attentiveness, making each shot more intentional.
- A distinct look for each film: grain, contrast, colors, texture. The film aesthetic has a personality that many still seek today.
If you want to extend this learning, film photography books remain a very good complement. A clear and progressive book can help you review concepts between rolls and consolidate what you learn in the field.
Difference Between Film SLR and Digital
The fundamental difference with digital lies in the mechanics itself: in film, once the exposure is made on the film, there is no immediate feedback or possibility of erasure.
A film SLR uses a mirror that reflects the image into the optical viewfinder, then lifts up when the shutter is released to allow light to reach the film. This operation is mechanical, direct, and often very reliable. On many models, focusing is manual, which requires a bit of attention at first but genuinely helps you improve.
A digital camera offers more flexibility: immediate preview, ISO change from one image to another, very large storage capacity. This is convenient, of course. But for a beginner who wants to choose a solid learning method, film remains an excellent school for exposure, composition, and observation.
Slower, But Stronger Learning
Starting film photography isn't about going slower for the sake of it. It's about learning in a clearer framework. You observe the scene, you evaluate the light, you set your camera, then you shoot. This sequence of actions builds lasting habits.
Many photographers who start this way then retain a better understanding of exposure, focusing, and the actual role of the equipment. Whether you transition to digital later or not, this foundation remains invaluable.
Choosing Your First Film Camera
The used market is full of reliable options at still reasonable prices. When you want to do film photography, the most important thing is not to find the perfect camera, but to choose a camera adapted to your learning style, your budget, and your desire to progress on the basics.
SLR or Compact: Which Camera to Choose
For a beginner who wants to learn composition, exposure, focus, and aperture without unnecessary complication, the 35mm SLR often remains the best starting point. This type of camera offers a good balance between assistance and control. You can advance step by step, use a semi-automatic mode at first, then take more control as you progress.
Another advantage: interchangeable lenses. They allow you to upgrade your camera without changing everything, which makes learning more consistent over time.
Compact cameras also have real advantages. Lightweight, discreet, easy to carry, they are very suitable if you primarily want to photograph without getting lost in settings. For street photography, vacations, or everyday life, it's often a very pleasant solution. However, it offers little leeway on exposure, which limits technical learning.
Rangefinders, on the other hand, appeal with their often compact size and optical quality. But their focusing requires more practice. For a beginner, it's generally better to first learn the basics with a more direct camera, then move on to a rangefinder if the desire persists.
Recommended Film Cameras and Their Budget
Here are some reliable models, common on the used market, and well-suited for a first experience.
- Canon AE-1: a very well-known SLR, produced in the late 1970s, with shutter priority and automatic mode. It's often found with a 50mm lens, between €150 and €250.
- Pentax K1000: fully mechanical, simple, and robust. It helps to understand exposure in a concrete way, without too much electronic assistance. Expect to pay between €100 and €200.
- Minolta X-700: versatile, pleasant to handle, with aperture priority and program mode. Its price-quality ratio remains interesting, often between €120 and €180.
- Olympus Trip 35: an automatic compact camera equipped with a selenium cell, without a battery. Simple, reliable, and practical, it's often found between €80 and €150.
If you're starting with an SLR, preferably aim for a camera from the 1970s to 1990s with at least a semi-automatic mode. A 50mm f/1.8 is often an excellent choice to start: it's affordable, versatile, and close to a natural rendering for everyday use.
Verification Criteria When Buying Used
A used film camera always deserves a few simple checks. Test the shutter at several speeds. Examine the lens in the light to spot any scratches, fog, or fungus. Also, check that the light meter reacts when the light changes in front of the camera.
Also think about the light seals. When they are worn, they can let light in and compromise your film's exposure. This is a common flaw on old cameras, but it's easily and affordably repaired.
If you buy from a professional, look at what is actually checked: camera function, lens condition, meter accuracy, warranty. This often makes the difference between a reassuring purchase and a camera that will remain on a shelf.
Which Film to Choose for Beginners
In film photography, the film speed is set as soon as you load the film into the camera. Unlike digital, you cannot change it from one image to another. This initial choice therefore directly influences your exposure, your margin of error, and your learning comfort.
Black and White or Color: Film Families
- Color Negative (C-41): This is the most common type. It offers good exposure latitude, can be developed in most labs, and is often the simplest choice for a beginner.
- Slide Film (E-6): Colors are bright and saturated, but the margin of error is much smaller. Development is also rarer and more expensive. It's better to save it for later.
- Black and White: Very educational, with an often expressive grain and good exposure latitude on the most common references. It's also a good entry point if you ever plan to develop at home.
| Film | Type | ISO | Main Characteristic | Approximate Price |
| Kodak Gold 200 | Color | 200 | Warm and bright rendering, accessible | 6-8 € |
| Kodak Ultramax 400 | Color | 400 | Very versatile, tolerant | 8-10 € |
| Ilford HP5 Plus 400 | Black and white | 400 | Balanced contrast, pleasing grain | 7-9 € |
| Kentmere PAN 400 | Black and white | 400 | Very forgiving, entry-level | 5-6 € |
Recommended Films for Beginners
If you're still undecided, choose a 35mm film at ISO 400. This is the simplest starting point. This value remains versatile enough for outdoor use, but also more comfortable as the light decreases. For a beginner, this limits the risk of underexposure, which is often harder to correct than a slight overexposure.
Two references are often recommended for good reason: Kodak Ultramax 400 in color and Ilford HP5 Plus 400 in black and white. They are easy to find, flexible to use, and reassuring for learning. If your budget is tighter, Kentmere PAN 400 is also a coherent option to start with.
The most useful thing, at first, is not to try many films. It's to know one really well. Stick with the same film for several rolls, observe how it reacts to the light, and carefully examine your results. You'll understand your exposure much better, and then you'll know how to choose wisely.
Mastering Exposure in Film Photography
In film photography, exposure is decided before the shot. Once the image is made, you cannot correct it on the back of the camera. This is what makes learning so educational: by understanding a few simple basics, you quickly gain consistency and confidence, even as a beginner.

The Exposure Triangle Explained Simply
Exposure adjustment in film photography relies on three elements that work together: aperture, shutter speed, and film ISO sensitivity. Aperture controls the amount of light entering the lens, as well as the depth of field. Shutter speed determines how long this light reaches the film. As for ISO, it is fixed by the chosen film and does not change during the roll.
If you open the aperture wider, you let in more light and must compensate with a faster shutter speed. Conversely, closing the aperture requires slowing down the shutter speed to maintain the same exposure.
Specifically, a wide aperture like f/2.8 is well suited for a portrait with a blurred background. A small aperture like f/16 will be more suitable for a sharp landscape from foreground to background. In terms of shutter speed, 1/1000s freezes motion, while 1/30s allows for motion blur. With a 50mm lens, going below 1/60s handheld significantly increases the risk of camera shake.
Sunny 16 Rule and Light Reading
The Sunny 16 rule remains a very useful basis if you want to learn to read light without entirely relying on the built-in meter or an external light meter. In bright sunshine, set the aperture to f/16 and choose a shutter speed close to the inverse of your film's sensitivity: for example, 1/400s with an ISO 400 film. It's simple, quick, and very practical for checking if your camera's reading seems consistent.
The camera's TTL meter measures the light passing through the lens. It generally tries to bring the scene to a medium gray, around 18%. This is effective in many situations, but not all. In a very bright scene, like snow or a beach in full sun, automatic metering tends to darken the image: you often need to add between +1 and +1.5 EV of exposure. In a dark scene, you can, on the contrary, slightly reduce the light to prevent the image from looking washed out.
When the light is very contrasty, it's best to be cautious. Measure preferably by taking into account the highlights. On film, severe overexposure is difficult to recover, whereas a slightly underexposed shadow area can often be better salvaged during development.
Common Exposure Errors and How to Avoid Them
Underexposure is the most frequent error among beginner photographers. It often results from an ISO film poorly suited to the available light, or a light meter fooled by a difficult scene. To simplify things for yourself at the beginning, a basic setting works well in many outdoor situations: aperture between f/5.6 and f/8, shutter speed between 1/125s and 1/250s, with an ISO 400 film.
One last reflex makes a big difference: note down your settings. The aperture-shutter speed pair, the light of the moment, your intention, and the result after development.
From Development to Progression: Next Steps
Once your first roll is finished, film development becomes a very formative step. Looking at your images, spotting a good exposure, understanding a missed shot or a poorly chosen aperture – all this is as important as the moment of shooting.
Lab or Home Development for Film
For a first film development, the lab remains the simplest choice. Expect to pay between €8 and €15 per film, including low-resolution scan, without investing in equipment.
- Professional lab: €8 to €15 per film with scan, no equipment to buy, results in a few days, practical solution for beginners.
- Home B&W development: Budget €60 to €100 initially for the tank, developer, stop bath, and fixer. After that, the cost per film becomes low.
- C-41 color development: This requires a stable temperature of 38°C and baths with a limited lifespan. Initially, it's best to entrust it to a lab.
- Negative storage: Always retrieve your negatives after processing, ideally cut and stored in sleeves, then store them away from light, dust, and humidity.
At home, developing a black and white film takes six steps: loading in total darkness, developing, stop bath, fixing, rinsing, then drying for 4 to 8 hours. The most delicate moment is at the beginning, when you need to load the film into the tank without light. Once the tank is closed, you can continue in normal light.
Good practices for loading and storing your film
In film photography, a few good habits save time and prevent many errors. To correctly load a film into a camera, place yourself in the shade, properly engage the leader, take two blank shots, then check that the rewind knob reacts when you advance the film. On an SLR, this simple check quickly shows if the film is properly advancing.
Never open the back of the camera before complete rewinding, until the final click. Also remember to advance the first two or three frames after loading: this limits the risk of fogged images at the beginning of the roll.
To store your films, keep unexposed films in the refrigerator in their original packaging. Let them return to room temperature for an hour before use. Also avoid leaving an already started film in the camera for too long, and do not expose it to airport scanner X-rays.
Practical methods for quick progress
If you want to progress faster in film photography, take notes. Note the aperture, speed, light, and, if necessary, your intention for each shot. Without this tracking, it becomes difficult to link the final result to your choices at the time of exposure.
If you want to go back to basics, the article getting started in analog photography details each step in order.
You can also work in simple series: the same subject, under the same conditions, changing only one setting at a time, either aperture or speed. After development, the comparison is often much more telling.
Frequently Asked Questions
What is the best film camera to start with without breaking the bank?
For a beginner, an SLR often remains the simplest choice for understanding the basics of film photography. Among the most recommended types of film cameras, the Canon AE-1 typically sells for between €150 and €250, and the Pentax K1000 between €100 and €200. These are two robust film cameras, well-documented, with a 50mm lens that is easy to find used.
If your budget is tighter, the Minolta SRT 101 is a serious option, often available between €30 and €80. For a more serene beginner film photography experience, it's better to choose a simple camera in good condition, with a functional light meter. If you're looking for a beginner film photography guide or a film photography guide to compare models, our France Argentique selection offers inspected and guaranteed cameras for 6 months.
Which ISO film should I choose for my first rolls?
For beginner film photography, ISO 400 film is the simplest and most flexible choice. It works well in many situations, both outdoors and indoors, and it tolerates small exposure errors quite well.
For color film, Kodak Ultramax 400 is a practical reference to start with. For black and white films, Ilford HP5 Plus 400 remains a reliable choice. At the beginning, the most useful thing is to stick with the same film for several rolls before comparing other films. You'll understand more quickly what changes in light, camera settings, and your photographic approach really make in analog photography.
How do I know if my beginner film camera is properly exposed without a screen?
Without a screen, you learn to rely on simple benchmarks. In film photography, the Sunny 16 rule remains a very useful basis: in bright sunlight, you set f/16 with a shutter speed close to the reciprocal of the ISO film speed. This method helps to understand exposure and better read the light, especially when starting out in beginner film photography.
Then, your camera's built-in light meter takes over in most cases. However, it can be wrong when faced with a very bright or very dark scene. The most instructive approach is to note your settings, then compare them with the results after development.