

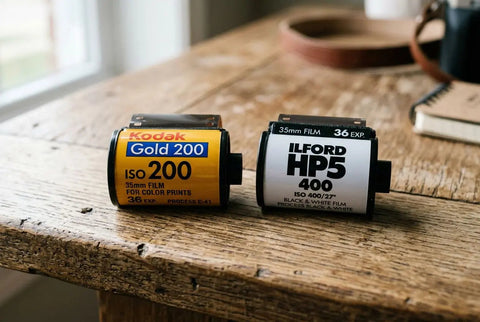
Choosing between ISO 200 and ISO 400 film might seem trivial, but this decision directly impacts your ability to adapt your exposure to varying conditions. The difference between 200 and 400 film lies in ISO sensitivity, grain, and adaptability to your shooting conditions. This choice primarily depends on your shooting style, available light, and the desired aesthetic.
Understanding ISO Sensitivity: The Fundamental Differences Between ISO 200 and 400
The ISO sensitivity of analog film determines the amount of light needed to produce a correct exposure. An ISO 200 film is half as sensitive as an ISO 400, meaning it requires more light or longer exposure times for an equivalent result.

How ISO Sensitivity Influences Exposure, Shutter Speed, and Shooting in Photography
Moving from 200 to 400 ISO allows you to gain a full stop of exposure. This means you can use a shutter speed twice as fast or close the aperture by one stop without losing exposure. If you shoot at ISO 200 with a shutter speed of 1/60s and an aperture of f/2.8, you can switch to 1/125s at ISO 400 under the same light conditions.
This extra leeway becomes invaluable when the light dims or your subject moves. On a compact camera with limited settings, ISO 400 significantly reduces the risk of motion blur indoors or late in the day. Conversely, ISO 200 often requires slower speeds, with a higher risk of blurry photos if shooting handheld.
Light and Usage Conditions: Choosing Between ISO 200 and 400 Film in Analog Photography
200 film yields excellent results in abundant and stable light: sunny days, outdoor landscapes, outdoor portraits under continuous natural light, well-lit scenes, and situations where you can anticipate your settings. If you know in advance that you will be working in a bright and predictable environment, ISO 200 is a consistent choice.
ISO 400 is more flexible in less comfortable situations: well-lit interiors, overcast skies, winter scenes, streets late in the afternoon, or reporting without flash. This versatility makes it particularly reassuring for beginners and users of point-and-shoot cameras, who cannot always quickly adjust their settings according to the available light.
Exposure Latitude, Pushing, and Adjusting: Compared Advantages Between ISO 200 and 400
A 200 ISO film has remarkable flexibility: you can expose it between ISO 100 and ISO 400 while achieving very beautiful results. The Harman Phoenix II 200 ISO film is a beautiful illustration of this. Exposed at ISO 100, it reveals softer tones and reduced contrast. Conversely, if you expose it at ISO 400, you accentuate its contrast and the vibrancy of its colors.
A 400 ISO film, on the other hand, offers even greater exposure latitude. It can be pushed up to ISO 3200, with an adjustment to development time. The famous Ilford HP5 Plus 400 black and white film in 35mm format demonstrates this versatility well. It gives you comfortable leeway to cope with the vagaries of light, without altering the quality of your shots.
As a reminder, the pushing technique involves underexposing the film during shooting, then extending its development to compensate for this lack of light. If you apply this method to a 200 ISO film to use it as a 400 ISO, you will get images with a strong character, with more pronounced grain and deeper blacks. Retaining, conversely, consists of overexposing the film then under-developing it, which softens contrasts and reduces the presence of grain. These methods are formidable creative tools, even if they do not replace the choice of an emulsion natively adapted to your shooting conditions.
Grain and Visual Render in Analog Photography: Essential Differences Between ISO 200 and 400
Grain is the very signature of analog photography, and it is often what guides your preference between a 200 ISO film and a 400 ISO film. With equivalent emulsion technology, higher sensitivity comes with more visible grain. By learning to tame this texture, you will be able to better anticipate the rendering of your shots and choose the film that will give your images the desired aesthetic.

ISO 200 vs 400 Film Grain: What Changes in Analog Photography
A 200 ISO film generally offers a fine, discreet, and polished grain. It is particularly suitable if you like soft images, where the texture accompanies the subject without dominating. The choice of ISO 200 400 sensitivity is therefore mainly oriented around your artistic preferences: do you prefer the sharpness of delicate modeling or the charm of a more present grain?
- Finer halide crystals: the emulsion structure of a 200 ISO film produces a tight and delicate weave.
- A discreet rendering: the texture remains subtle, ideal for medium-sized prints where the level of detail is paramount.
- Natural softness: light gradations and color transitions occur with great smoothness.
- Preserved balance: you enjoy the inimitable character of analog, without getting a rough rendering.
ISO 400 film offers a classic, visible grain, but generally better structured and controlled. Some high-end models, such as the Ilford HP5 Plus 400 black and white film in 35mm, are renowned for maintaining a particularly fine grain despite their high sensitivity. This highlights a useful point: emulsion formulation often matters more than the ISO value alone. With a well-designed film, you get the texture specific to analog without losing too much detail or legibility.
| Characteristic | ISO 200 Film | ISO 400 Film |
| Visible Grain | Fine and discreet, tight structure | Classic, controlled and structured |
| Silver Crystals | Fine and tight crystals | Balanced, well-ordered crystals |
| Aesthetic Effect | Assertive and contrasted rendering, increased sharpness | Balanced and natural, visible but discreet grain |
| Perceived Sharpness | Excellent, detail well preserved | Very good, visible but controlled grain |
| Usage Recommendation | Artistic projects in controlled light | Everyday photography, versatile use |
Contrast and Aesthetics Depending on ISO Sensitivity in Analog Photography
Beyond grain, contrast also varies significantly between ISO 200 and ISO 400. An ISO 200 film often tends to produce more contrasted images, with dense blacks and a more marked separation between tones. This rendering can give more presence to the image, in black and white as well as in color, especially if you are looking for a stronger saturation.
ISO 400 generally offers a more balanced contrast. Blacks remain deep, but mid-tones and nuances are often better preserved. This behavior is well suited for portraits, where softer tonal transitions are appreciated, but also for landscapes, when you want to retain detail in both shadows and highlights. In color, an ISO 400 film often provides a more flexible palette and more progressive gradients than an ISO 200.
The Harman Phoenix II 200 color 35mm film perfectly illustrates the contrasted rendering that a film of this sensitivity can offer: sustained colors, dense blacks, and a more pronounced general atmosphere. This assertive character can very well serve an artistic approach in controlled light, but it will be less suitable if you are looking for more subtlety in the tones. In practice, choosing between a more contrasted rendering in ISO 200 and a more balanced rendering in ISO 400 significantly changes the final personality of your images.
Push and Pull: Modifying Grain Without Changing Analog Film
Push and pull are development techniques that allow you to adjust the effective sensitivity of an analog film without changing the film itself. Pushing involves deliberately underexposing the film during shooting, then increasing development time to compensate and obtain a usable exposure. This way, you can use an ISO 200 film as if it were ISO 400, or even ISO 800, giving you more leeway in low light or to use a faster shutter speed.
Pulling works the opposite way: you intentionally overexpose, then reduce development time. This technique can soften contrast and produce a softer, sometimes finer, rendering depending on the film used. A photographer who pushes an ISO 400 film to ISO 800 will generally get more grain, more contrast, and denser shadows, which significantly alters the final rendering. These techniques offer true creative freedom, but they require a methodical approach and a clear idea of the desired result.
Choosing Between ISO 200 and 400 Film According to Your Use in Analog Photography
The choice between ISO 200 and ISO 400 mainly depends on your shooting conditions and the rendering you prefer. When starting out, ISO 400 is often the most reassuring choice, because it adapts to more situations. Conversely, an ISO 200 film might suit you if you primarily shoot outdoors in good light and are looking for a more composed rendering, with an image structure that has character.

ISO 200 Film: For Which Type of Photography and Under What Light Conditions
ISO 200 film yields excellent results when natural light is sufficient and you are looking for a strong rendering. It is well suited for street photography during the day, outdoor portraits under stable natural light, as well as landscapes and architecture when lighting conditions remain consistent.
- Landscape photography: it allows for beautiful precision and a contrasted rendering in abundant light.
- Natural light portraiture: outdoors, with soft and constant light, it can produce a nuanced and pleasant image.
- Documentary or creative photography: depending on the emulsion chosen, its rendering can bring an interesting visual presence to a personal or editorial project.
ISO 200 film requires a little more attention to exposure and available light. On an automatic compact camera, it can become limiting late in the day or indoors without flash, as the camera may choose too slow a shutter speed. This risks blurry or underexposed images. It offers less leeway than ISO 400 and is primarily relevant when you know the conditions under which you will be shooting.
ISO 400 Film: Versatility, Recommendations, and Practical Advantages
In practice, ISO 400 is the film that is at the center of most recommendations, because it suits the majority of real shooting situations. It allows you to shoot indoors, outdoors on cloudy days, late in the day, and in changing light conditions, without compromising quality too much. This balanced sensitivity makes 400 ISO films very popular with analog photographers who prefer to concentrate on their subject rather than on managing the light.
- Indoor photography: it offers a comfortable safety margin to avoid motion blur without systematically resorting to flash, allowing for a more natural and discreet approach.
- Reportage and street photography: it adapts to changes in lighting without requiring constant recalculation of exposure, which makes it well suited for fleeting moments.
- Versatile everyday photography: it is a good sensitivity to use the same film from morning to evening, indoors and outdoors.
ISO 400 is also very useful with point-and-shoot cameras with limited settings: it reduces the need for flash, limits the risk of motion blur in low-light scenes, and offers a safety margin in case of exposure error. If you are looking for an analog film without complicating your life, ISO 400 remains a very good starting point, especially when you are new to it. 200 film becomes relevant in a more specific case: when you control your lighting conditions or deliberately seek its particular rendering.
Frequently Asked Questions
When to use ISO 200 film and when to use ISO 400 film?
ISO 200 film is suitable for situations with abundant and stable light: sunny days, well-lit landscapes, outdoor portraits under consistent natural light, and scenes where lighting is well controlled. It is a good choice if you know your shooting conditions and are looking for a precise rendering.
ISO 400 film covers most other uses: bright interiors, overcast weather, street photography late in the afternoon, and changing light. Its higher sensitivity offers valuable flexibility to adjust your exposure more easily, making it a reassuring choice if you are a beginner or using a point-and-shoot camera.
Is Kodak ISO 200 or 400 film better: is there a better choice?
No ISO sensitivity is objectively superior to another: it all depends on your shooting conditions and the look you are aiming for. A Kodak 200 film will generally give a finer grain and often more pronounced contrast, which can suit certain visual intentions, while a Kodak 400 will offer more flexibility and greater exposure latitude.
If you're unsure, 400 film is often the easiest choice, as it adapts to a wider range of light. However, if you mostly shoot outdoors in good weather and want to make the most of abundant light, 200 film can be very suitable. The wrong choice is primarily a film ill-suited to the available light: too low a sensitivity in low light risks producing underexposed or blurry images, while too high a sensitivity in bright sunlight can complicate exposure, especially on some cameras with limited shutter speed.
Can you switch from ISO 200 film to ISO 400 film or vice versa?
Yes, without difficulty, provided you adjust your settings. If you switch from ISO 200 film to ISO 400, or vice versa, you need to correct the exposure accordingly, with shutter speed, aperture, or both. On a semi-automatic or manual camera, you simply need to set the ASA or ISO value correctly on the body. On an automatic DX-compatible camera, film detection is often automatic.
The most visible change concerns the final rendering: depending on the emulsion chosen, you may observe differences in grain, contrast, and exposure latitude. It is also possible to use push or pull processing, i.e., developing a film as if it had been exposed at a different sensitivity, but this method also alters the image's rendering. If you want to compare practically, the simplest way is to try both sensitivities on similar scenes, in your usual practice. This will show you which one best suits your style and preferred shooting conditions. To learn more, you can consult this page on ISO sensitivity.