

Summary
- What is a film camera?
- The role of the lens in a film camera
- How film captures light
- The film development process
- Choosing your film to start with analog photography
- Frequently Asked Questions
Understanding how a film camera works is about seeing how light passes through optics, precise mechanical adjustments, and then gets recorded on film through a chemical process. Behind an analog photo, there's a central principle: controlling the amount of light that reaches the film at the moment of exposure to achieve the desired result.
What is a film camera?
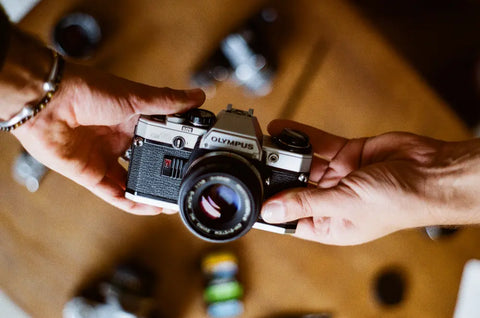
A film camera is based on two main components. First, a lens that forms the image by directing light. Second, a light-sensitive film, made of silver salts, which records this image. This connection between optics, mechanics, and silver defines how a camera works.
Unlike digital, the image is not captured by a sensor. It is fixed on a physical medium. Each shot therefore leaves a material trace on the film, with its grain, its specific sensitivity, and its rendering.

The mirror viewfinder in film cameras
On many analog SLR cameras, the mirror viewfinder allows you to see in the viewfinder what the lens actually shows. Light enters through the lens, hits an inclined mirror, then is reflected to a prism or pentamirror before reaching the eye. At the moment of exposure, the mirror flips up to allow light to reach the film.
This system makes framing more precise and helps in better judging focus, aperture, and depth of field.
- SLR (single-lens reflex): Viewing and shooting use the same lens. This is the most common format for Nikon, Canon, Pentax, or Minolta.
- TLR (twin-lens reflex): Two superimposed lenses, one for viewing, the other for exposure. This principle is often found on older medium format models.
- Specific mounts: Nikon F, Canon FD, Pentax K, Minolta MD, or M42 determine compatibility between camera and lens.
- Film advance: After each shot, the film is advanced to place a new frame behind the shutter.
Depending on the model, film cameras offer a full manual mode, aperture priority, program mode, and sometimes an automatic mode. Focusing often remains manual, which requires some attention but also helps to better understand your settings. If you are looking for a model suitable for your practice, you can consult this selection of analog SLRs.
Shutter, aperture, and exposure
Exposure depends on two main settings: the aperture of the diaphragm and the shutter speed. Aperture controls the size of the light opening in the lens. Shutter speed determines how long this light reaches the film. Together, these parameters define the amount of light recorded during the shot.
A fast shutter speed allows you to freeze a moving subject. A slower speed allows for motion blur. Meanwhile, aperture also influences depth of field, which is the area of sharpness in the image.
Film photography and digital: a different logic
In film photography, the film predetermines several important choices: sensitivity, color or black and white rendering, and part of the final grain. These parameters are not changed image by image. This forces you to observe the light before shooting and to adapt your settings with more care.
It makes each photo more engaging, without unnecessarily complicating the practice. With a little practice, you better understand the role of the lens, exposure, and film.
The role of the lens in a film camera
In an analog camera, the lens doesn't just capture the scene. It directs light towards the film, directly influencing sharpness, contrast, brightness, and the overall character of the image. Optical quality, focal length, and aperture are often as important as the camera body itself in the rendering of an analog photo.
Optical signature and depth of field on film
Each analog lens has its own personality. Some optics produce softer contrast, while others enhance micro-sharpness. The bokeh, distortion, the way the lens reacts to backlighting, or how it renders colors can also vary significantly from one model to another. On older equipment, these differences are often more visible, and this is precisely what attracts many analog photographers.
Depth of field largely depends on the aperture. With a wide aperture, such as f/1.4 or f/2, the subject stands out more easily against a blurred background. At f/8 or f/11, the zone of sharpness extends further, which is well suited for a street scene, a landscape, or architecture. This setting always works with focal length and focusing distance.
Lenses for film cameras according to their uses
On a camera with interchangeable lenses, changing the optic immediately transforms your way of photographing: the angle of view, brightness, perspective, and depth of field vary depending on the chosen model.
If you are looking for an analog lens for your film camera, the easiest way is to start with your uses. You can find a selection of film camera lenses to equip your camera body.
- Bright prime lenses: with a wide aperture, often from f/1.4 to f/2.8, they are very useful in low light and appreciated for portraits. They allow reducing depth of field, better managing brightness without pushing ISO too high, and achieving a pronounced background blur.
- Wide-angle lenses: generally between 24 and 35 mm, they are well suited for landscape, street photography, and indoor spaces. Their wider coverage facilitates immersive framing and often provides a naturally wider depth of field.
- Telephoto lenses: from 100 mm upwards, they are used to photograph distant subjects, in sports as well as in nature. They tighten the frame, compress perspective, and help isolate the subject.
- Versatile zooms: they combine several focal lengths in a single optic. This is a practical solution for travel or reporting, even if these models are often less bright than a prime lens with equivalent aperture.
One point always deserves your attention: compatibility. A lens must match the mount of your film camera. Nikon F, Canon FD, Pentax K, Minolta MD, Konica AR, or M42 each follow their own logic. Before buying, check the mount of your camera body, but also the operation of the focus, exposure, and, depending on the case, the light meter. Adapters exist, but they can limit certain automatisms or make use less fluid.
It is chosen according to your practice, your relationship with light, the film you use, and the type of image you want to create in analog photography. This is often what shifts a photo from an acceptable result to a truly mastered image.
How film captures light
Film is at the heart of the analog process. To understand what distinguishes an analog film from a digital sensor, one must go back to its very substance: an emulsion capable of reacting to light and recording a latent image before development.

The chemical structure of film and silver halide crystals
Film is made of a plastic base coated with a gelatin emulsion. In this layer are dispersed silver halide crystals, most often silver bromide in modern emulsions. Gelatin not only serves as a binder: it keeps the crystals separate from each other so that each reacts individually to exposure.
- Silver halide crystals: each silver bromide crystal contains a very large number of Ag+ and Br− ions organized in a cubic lattice. These are what make the film sensitive to light.
- Role of gelatin: it keeps the crystals in suspension, stabilizes them, and allows a controlled reaction during exposure.
- Grain size: on fine-grain film, a crystal typically measures about 0.5 micrometers. A 24×36 mm negative contains nearly two million of them, which directly contributes to the rendering of both black and white and color film.
Larger crystals capture light more easily and increase ISO sensitivity, but make the grain more visible. Smaller crystals produce a finer image, at the cost of more generous exposure.
How the latent image is formed during exposure
At the moment of exposure, photons strike the emulsion and trigger a reaction in the crystals. Electrons are released upon contact with the silver halides, then captured by the Ag+ ions, which transform into metallic silver atoms. These atoms accumulate in very small quantities in certain crystals: this is how the latent image is born, invisible to the naked eye but very much present in the film.
The mechanism is precise, but it only uses a portion of the received light. It is estimated that about 15 photons are needed to form 3 silver atoms, which is the minimum for a grain to become developable. Approximately 80% of the light that reaches the film is not retained, due to very rapid electronic recombinations. This limitation is part of the very nature of photographic film and partly explains the relationship between sensitivity, brightness, and exposure.
Color film, black and white film: what are the differences?
Black and white films rely on a simpler structure. They use a sensitive layer that records variations in brightness in gray values. This is what gives black and white its direct reading of contrasts, textures, and forms. Their development is also more accessible, which often makes them a good entry point into analog photography.
Color film works differently. It has several layers sensitive to different areas of the light spectrum, particularly red, green, and blue. This construction allows for color reproduction after development. Depending on the types of film, the rendering can change significantly: some references favor warm and soft tones, others brighter and more contrasted colors. The choice is made before loading the camera. Once the film is in place, you cannot switch from color film to black and white film midway through.
In practice, choosing between different film types involves a trade-off between rendering, grain, ISO sensitivity, and ease of development. If you are starting out, primarily observe the available light, the brightness of the scene, and the type of image you want to achieve.
The film development process
Once the film has been exposed, the image already exists, but it remains invisible. This is referred to as a latent image. Analog development serves to reveal it, then stabilize it so that the film can be handled, preserved, and used without risk. As long as the film is not fixed, it remains sensitive to light. This is why the development process begins in complete darkness.

Developer, stop bath, and fixer: the key steps in analog development
The core of the development is the developer bath. During exposure, light modified certain sensitive crystals contained in the film's emulsion. The developer acts on these exposed areas and transforms the aggregates of silver atoms into black metallic silver, visible on the film. For the reaction to occur, the crystals must contain at least 4 silver atoms in an aggregate. Below this threshold, no visible trace appears on the negative.
Next comes the stop bath. Its function is simple: to quickly halt the action of the developer to prevent the chemical reaction from continuing. The fixer then takes over. It removes undeveloped silver salts, still sensitive to light, and stabilizes the film. After this, a thorough wash with running water removes chemical residues. A wetting agent can be added at the end of the treatment to minimize drying marks.
From negative to final image
At the end of this development process, a negative is obtained. The values are inverted: the areas of the subject that received a lot of light become dark, as they contain more metallic silver. Conversely, the less exposed areas remain lighter.
- Printing on paper: the negative is used to project or filter light onto photosensitive paper, which also undergoes development to produce a positive image.
- Digitization: the negative can be scanned to obtain a digital file while preserving the unique rendering of film photography.
- Conservation: properly stored, away from light, humidity, and heat, negatives can last for several decades.
Working with film involves its own logic: each choice regarding ISO, exposure, and rendering is part of a physical chain that digital does not reproduce.
Choosing your film to start with analog photography
Choosing a photo film is never a minor detail. In analog photography, a good part of the rendering is decided even before the first shot: grain, contrast, colors, light sensitivity, and exposure latitude depend on the film you load into your camera. Unlike digital, these settings cannot be changed during the process. Therefore, it's best to start with a simple base suited to your use.
The film format to choose based on your camera
The first point to check is the film format accepted by your camera. A 35mm film will not work in a medium format camera, and a 120 film is not suitable for a camera designed for 135. If in doubt, open the camera back or consult the manual: the format is usually clearly indicated.
- 35mm Format (135): This is the most common format for beginners in film photography. It is used in most SLRs and many compact cameras. It comes in 24 or 36 exposures, with a 24 × 36 mm negative.
- 120 Format: Used in medium format, it offers a much larger negative area. The rendering is often finer, with a more subtle grain and more detail in the image.
- Compatibility Check: Before buying a film roll, always check the film compartment or the manufacturer's instructions.
If you're starting out, 35mm remains the simplest choice. Films are easy to find, the cost is more reasonable, and everyday use is more flexible. The 120 format has many advantages, but it is primarily for those who want to explore a more deliberate rendering, with a camera designed for it.
| Format | Negative Dimensions | Number of Exposures | Recommended Use |
| 35 mm (135) | 24 × 36 mm | 24 or 36 | Beginner, reportage, travel |
| 120, 6×4.5 cm | 56 × 41.5 mm | 16 | Portrait, superior quality |
| 120, 6×6 cm | 56 × 56 mm | 12 | Square format, studio |
| 120, 6×7 cm | 56 × 67 mm | 10 | Landscape, maximum rendering |
ISO sensitivity, color film, and black and white film
The second major criterion is ISO sensitivity. This is inherent to the film and does not change once the film is loaded. This sensitivity, often noted as ISO 100, 200, 400, 800, or 3200, indicates the film's ability to record available light. The higher the ISO sensitivity, the better the film performs when light levels drop. However, the grain generally becomes more visible.
For beginners, an ISO 400 film is often the best balance. It handles a variety of situations well: outdoors, overcast skies, brightly lit interiors, late afternoon. It also forgives small exposure errors more easily. Conversely, low sensitivity films, between 50 and 200 ISO, often produce a finer grain but require a lot of light. Films at 800 ISO or higher are useful when light is scarce, offering a more vivid and pronounced rendering.
Next comes the choice between color and black and white film. Again, this decision is made before shooting. Black and white films are very educational: they allow you to focus on light, volumes, contrast, and accurate exposure. Their development is also often simpler to approach. Color film, on the other hand, allows for working with the chromatic palette and atmosphere of a scene, with different renderings depending on the emulsions and brands.
One last guideline can help you: in film photography, you choose less "the best" film than the one most consistent with a situation. Abundant light, calm scene, desire for finesse: a low-sensitivity film makes sense. Low light, moving subject, need for flexibility: a higher ISO sensitivity will often be more suitable.
Frequently Asked Questions
How does a film camera work?
The operation of a film camera is simple to understand. A lens, or optic, directs light onto the photographic film. When taking a picture, the shutter opens for a precise amount of time to control the exposure. The light-sensitive film contains silver halide crystals that react as soon as they are exposed. This reaction creates a latent image, invisible at this stage, which will appear upon development.
Which film should I choose to start film photography?
To start smoothly, a 35mm ISO 400 film remains the simplest choice. This ISO sensitivity is suitable for many common situations, both outdoors and in well-lit interiors, and it provides a significant margin for exposure.
If you like simple and easy-to-read renderings, black and white films are very formative. Ilford HP5 and Kodak Tri-X are well-known black and white references. If you prefer color, Kodak Portra 400 and Fuji Superia 400 are proven options. In any case, the film is chosen before loading the camera, because neither the rendering nor the sensitivity can be changed mid-roll on film cameras.
What is the difference between a film camera and a digital camera?
The difference lies primarily in the medium that records the image. In film photography, the camera uses film whose emulsion reacts to light thanks to silver crystals. The resulting image then needs to be developed. In digital photography, a sensor converts light into a file saved on a memory card.
In a film photograph, the rendering depends from the outset on the chosen film: grain, contrast, color or black and white, but also ISO sensitivity. In digital, these settings are much more flexible from one image to another. This is what gives film cameras a more deliberate way of working, with a more direct relationship to exposure, the lens, and the very substance of the image.